Showing posts with label Lace. Show all posts

Monday, April 4, 2011

Monday Inspiration: Garden Wedding on a Budget


The Decor: Gardens are so romantic; they are the perfect location for a wedding. Gardens also make decorating really easy and less expensive because they are already so beautiful with all their flowers and greenery. Add a simple arch to tie in the wedding atmosphere!

The Food: You’ll save money on food by hosting an afternoon teaparty, rather than a full dinner meal. Serve cucumber sandwiches, quiches, fruit, and other classic tea party food. Fill pretty bowls with berries and set a bowl at every table.

The Dessert: Every good tea party has a plethora of pastries and sweet desserts. Petit fours, mini tarts, and french macaroons are great choices that not only taste good but look beautiful, not to mention a decadent cake, beautifully decorated and topped with a vintage crown.

The Fashion: To get your dream dress on a budget, shop at sites like PreOwned Wedding Dresses or Once Wed, where you can find dresses that have been worn just once at incredible savings. A big white sunhat would fit in with a teaparty theme perfectly–and would cost a lot less than a veil. The bride’s look would be complete with elegant lace gloves and shoes with rose details. For the bride’s bouquet, choose garden roses instead of peonies–they look very similar but cost so much less.

The bridesmaids could carry parasols or lace fans instead of bouquets. Let your bridesmaids choose their own dress to save stress and money. Each girl will look and feel good in a dress that complements her own body (just make sure that the colors, lengths, and styles look cohesive). Skip the tux rentals and put the groom and groomsmen in white shirts, suspenders, and khakis. Let them wear ties they already own, and they’ll save money too!

The Details: For the centerpieces, use teapots as vases and fill them with flowers.  Set the table with pretty mismatched china that you collect from thrift stores during your engagement. Using a gold pen, write the guest’s names on teacups that double as both placecards and personalized favors. On the guest table, decorate a gold birdcage with moss and flowers for a pretty cardbox. Use paper doilies to make envelopes for the invitations, petal cones, cupcake liners, and more–they’re so pretty and super inexpensive!

The Invitations: Love & Lavender designed a beautiful lace invitation suite to capture the personality of this garden wedding.
It is available to download for free here.

If you have a moment check out Love & Lavenders BLOG for more great tips, and inspiration. Below are the Links for the fabulous images featured above. Enjoy!

Thanks for stopping by!
For more great wedding posts and ideas check out our BLOG
for Info about our Wedding and Event Services visit our WEBSITE


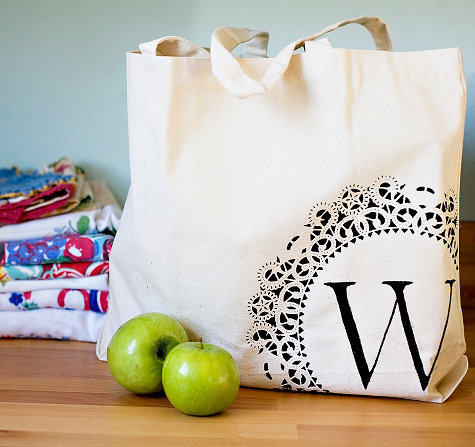
Image Sources:  Seating Chart picture by Jose Villa, Table Setting via Wedding Whim, Cake via Elizabeth Messina , Envelopes via This is Glamorous, Teacups via 100 Layer Cake, Berries via Grey Likes Weddings, Teapot via The Exchange, Invitation via Love and Lavender, Bouquet via Martha Stewart, Sandwiches via The Loving Spoonful, French Macaroons via Martha Stewart, Archway via Rose Garden,  Groomsmen via Pretty Chicky , Birdcage via Mints Design, Wedding dress via Oscar de la Renta, Bridesmaids via Utah Bride Blog, Shoes via Amazon.

Thursday, March 31, 2011

DIY: Monogrammed Bridesmaids Gifts

Today on the Forevermore Events BLOG we wanted to post a fun and SUPER easy Do It Yourself (DIY) project, for those special ladies in your life.
YOUR BRIDESMAIDS
After-all, your bridesmaids will be the ones standing next to you on the most important day of your life. I am sure that women that significant deserve a little SWAG..right?
Well, even if you are "crafty-challenged" this is an easy to project that will take you less than a day, and under $5 per gift.

The trend these days is Reduce, Reuse, Recycle and this gift fits right in perfectly, while being fashionable at the same time!
After reading about this DIY project on Design*Sponge & the lovely Ashley Ann Photography I just knew I wanted to share it with all of our readers! I have expanded the directions, because I am one of the "those" people that like a REALLY thorough tutorial.... so I hope that helps a little~

doily_canvas_bag_design_sponge

 Most of the supplies can be gathered from your local craft and fabric store, but I recently saw the LARGE paper doilies at The Dollar Store, and the local Party Supply store...after a quick reconnaissance trip i was pleasantly surprised to find that the local walmart had all the supplies in stock. So between the Craft Department and Party Supply Aisle, you will be all set.

Items Needed:
One Canvas bag (they also had plain aprons that would be super cute)
Acrylic Craft Paint- BLACK (or the color of your choice)
Spray adhesive
Paint Brush - stencil brush for applying the paint and a *fine tip* brush for filling in the letters
LARGE paper Doilies- the ones i found are the kind that go under fancy cakes- came 10 to a package.
and printable card-stock (if you want to make a LETTER stencil instead of free-handing it)

diy doily tote bag bridesmaids gifts

You may want to purchase an extra bag or do a trial run on a separate piece of fabric till you get the hang of it.
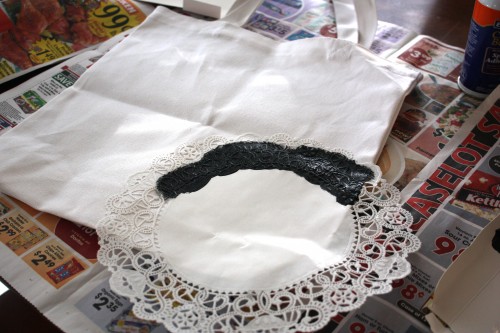
Begin by coating the backside of the doily with spray adhesive and getting it placed -just right- on your canvas bag. Let dry for a few minutes.
Start applying the paint slowly and carefully, make sure not to go over the edges, here is where all that "coloring inside the lines will come in handy" once that is coated well, let dry before peeling off the doily. With the fine brush touch up any missed spots and let dry for at least one hour before beginning the letters.

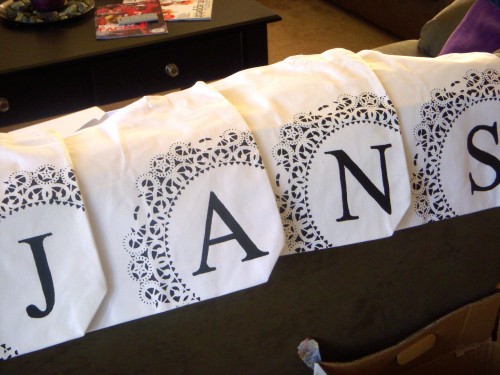
 For the Initials, go to your computer and find a font that you like for the monograms. Print them out (as large as you will need them) on the cardstock or even vellum if you have it handy.


Then use an exacto knife to carefully cut out the letter leaving a perfect stencil for your monogram.
Tape the stencil onto the bag making sure to not let it move while you are painting it. I would suggest using a pencil and tracing it on there then painting it carefully by hand with the *fine tip* brush, but try both ways and see what comes out better for you.

 
customized doily tote bags

You will adore the final product! Sleek, Trendy, Reusable.

Then, if you are feeling generous you can fill them with small gifts and goodies. A few ideas.... Body Lotions, Jewelry, Flip-flops, Photo Album, Journal, Chocolates, Scarf, or Gift Certificates for Massages or Manicures. So much fun wrapped in a personalized -Handmade by YOU- Gift Bag!

Worried about taking on the project by yourself?? Turn it into a Bridal Shower Project, that way Bridesmaids, Sisters, Mothers and Mother-to-be will have a chance to share in the fun and personalize the BAG their way!
Or you can call Forevermore Events today and we can get you a bid on MAKING these adorable custom bags for you!

Have your own DIY projects that you would like us to feature?? Leave us a comment with your IDEA, email address or link to your blog and we will take a look and possibly feature you right here on the FOREVERMORE EVENTS BLOG

Thanks for stopping by!
For more great wedding posts check out our BLOG
for Info about our Wedding and Event Services check out our WEBSITE


*Side Note* We love the blogging world and try very hard to give credit where credit is due, but we are also human (and sometimes post way too late at night lol) and do make mistakes... If we have missed a credit or photo source please don’t hesitate to contact us and we will be happy to make the necessary changes!  Thank you so much!!*